Thursday, 22 October 2009
Summary
Although the final works were not achieved the desired effect, but it is still to complete this work. If I had more time to learn production techniques, and accumulated enough experience, I believe I will do it better.
Wednesday, 21 October 2009
creat hair
Statement: create hair I was using the 3DS MAX 8.0, this version provides a hair and fur system. Head model I was using the 3DS MAX 9.0 software to build it.
Tuesday, 20 October 2009
group meeting notes
Once created the group would then have to look into produce:
- Textures
- Lighting
- Camera work
- Animation
On 23th oct ,we will continue to discuss the work of each member needs to be done, and the production process.
uvw mapping
, but some points still get together, so I need to put each point to the appropriate place. The next step is to export the UV map out of the 3D max software, converted to. tif format files into the photoshop software for mapping. This is a very complex task. First, I looked several times repeated tutorials and found a few more crucial part. Then I began to make the map. In the process because of his lack of experience, the UV map is a flat, while the photos are different from it. So I always can not find the exact location. But through the constant adjustment, get the final result.
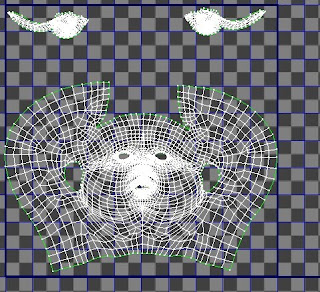
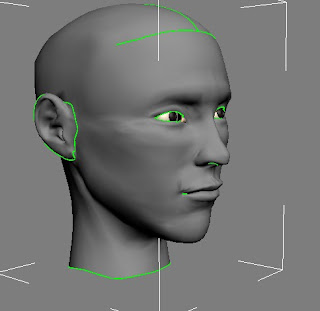
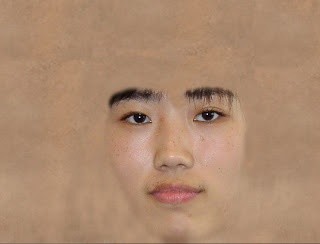
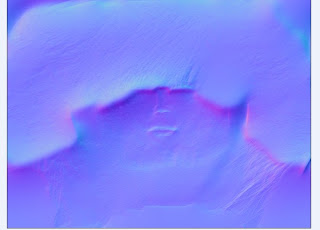
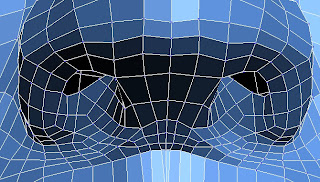
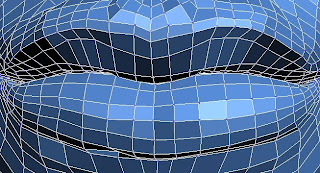
creating a nose,mouth,ear and back of the head
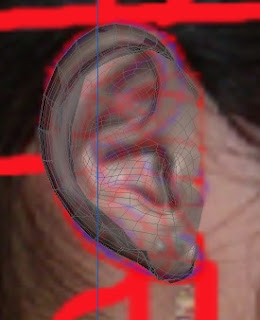
Create ear
I followed the video to learn to do ear model, but in the end I did not finish it. The problem I found is that I started concentrating too much on what the ear in the tutorial looks like. And some areas I do not quite understand what to do. Then I changed methods. First, the establishment of a rectangular box, converted to poly. Then I add a curve in the space. This curve should conform to the ear shape, and then continue to edit, at the modify command of modify, click the create shape from selection button and then select the pick line, at just pick up the curve, with the extrude command, and then adjust the location of points. Then I used cut command to add the lines, continue to adjust the location of points. Finally add a Mesh smooth command.
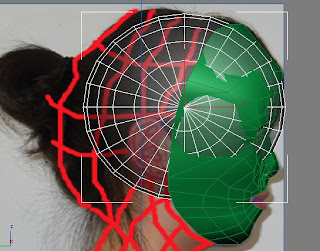
Create a sphere ,this sphere has to be of the same size to the face. Using the scale tool, I scaled the sphere to make it round the head shaped. After this, I changed the rectangular selection tool to paint selection. and then, holding down the ctrl key, choose not to be used place, and then delete. The next step was to delete the right side of the sphere and then to adjust points. The next step is mirror, the separation point welded together. And then continued to made neck. Through the copy the edge and regulation of points. Production method is similar with method of made the mouth. When I begin to make back of the head and neck, the problem is how to make a smooth surface. I choose to cut lines and then adjust point. Ultimately achieve the desired results.

Thursday, 8 October 2009
3D face
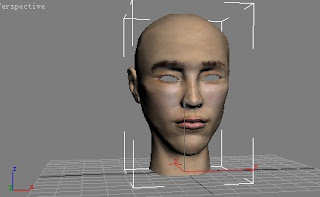
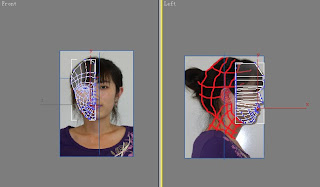
The main task of this week is to create the character's face model. Firstly, in the 3D MAX, Select front view, create lines, according a good wiring diagram of the picture painted to create lines. After it, select one of the closed frame into editable poly and then select the attach all of the lines add together. To welded to the separation of vertex. But in the welding process, some points are not welded, so I chose to use target welding method to weld point.This process must be avoided the triangle in order to facilitate the adjustment point position. Then go to the left view, based on the facial structure of the photo will adjust to the right position. This process is the very important and spent lots of time but also some areas in need of careful. I must carefully adjust the location of every point. Turning to perspective, and then continue to adjust each point.
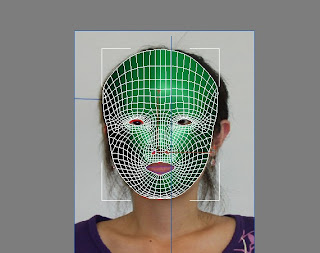
The next step is to complete the face model to make it. It can be achieved in two ways, one is a mirror, and another is to add a Symmetry Modifier. At first I use the mirror, but when the mirror finished, there are some problems that I discovered there are some points not in conformity with the location of photos and some points can not be welded together, so the ultimate effect of this method can not be achieved, I chose another method to add a Symmetry Modifier. The benefits of this method is that if I found something was wrong I can delete and re-do at the same time, this method can also be easily adjusted to point to the appropriate location of the photo.
Tuesday, 6 October 2009
topology of my face
Firstly, I did take photos in the lecture, and then I use the photoshop to cut photos.and had to adjust them to make them symmetrical.

Moved onto the next stage, draw lines where are features in my face. Just go through and try to isolate all the key areas. Around eyes, eyebrows, crow’s feet bridge of nose, tip of nose, cheek bone. The cheek bone needs a lot of control as it gives definition to the face. Also make sure that you draw in the indentation under cheek bone and nasal folds.

And then I have to draw some red lines ,but I have some problem with triangle's area and make it difficult to edit. It is very important in this work and the red lines making quads to help me create my face in 3D Studio Max later.When the teacher taugh me how to solve this problem, I decided to redraw the area. In the production process has some notes should be heeded:firstly,I must pay attention to the eye and nose and side of nostrils。 set of small quads on these place. secondly, Add the cheek, and nose,At this point the line extends to the around,which can continue down the cheek or round the eye. Thirdly, draw the chin area and side of mouth lines. Forehead and upper lip edge flow from the cheek bone, try to approach the upper lip vertically. When I draw the nose‘s lines, I try to avoid triangles. Think how surface should flow.

After this, I then had to move the image to 3ds max.Creating a plane,turn on UVW mapping and then to press the fit bitmap option. clone the plane,make them symmetrical.

I finished my work in this week. In the production process has encountered some troubles, for example, when I draw the lines of the nose and mouth I can not be avoided triangle. Drawing lines cheek and cheek bone area will always have some problems. The teacher told me how to solve these problems. Then I re-watch the video, finally, I successful solved these problems.


