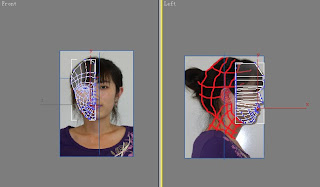
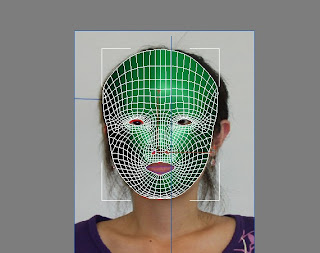
The main task of this week is to create the character's face model. Firstly, in the 3D MAX, Select front view, create lines, according a good wiring diagram of the picture painted to create lines. After it, select one of the closed frame into editable poly and then select the attach all of the lines add together. To welded to the separation of vertex. But in the welding process, some points are not welded, so I chose to use target welding method to weld point.This process must be avoided the triangle in order to facilitate the adjustment point position. Then go to the left view, based on the facial structure of the photo will adjust to the right position. This process is the very important and spent lots of time but also some areas in need of careful. I must carefully adjust the location of every point. Turning to perspective, and then continue to adjust each point.

The next step is to complete the face model to make it. It can be achieved in two ways, one is a mirror, and another is to add a Symmetry Modifier. At first I use the mirror, but when the mirror finished, there are some problems that I discovered there are some points not in conformity with the location of photos and some points can not be welded together, so the ultimate effect of this method can not be achieved, I chose another method to add a Symmetry Modifier. The benefits of this method is that if I found something was wrong I can delete and re-do at the same time, this method can also be easily adjusted to point to the appropriate location of the photo.

No comments:
Post a Comment