Through this group work, I learned a lot of new knowledge. Model is mainly produced separately. The most important part in the model is the details. In these parts of the components we must grasp the link of every component. It is not easy for me. When I began to get the model I am not very clear how to make it. I found some tutorials from the Internet, while reading some books which is the production of mechanical models. Through my practice, I finished the model. In the production process, I met a lot of problems because I rarely making produced the mechanical model before. When I made the Carburetor model, I separated all the components, but there are some parts I do not know what methods should be used. At the same time it is easy to make the model more precise. So I decided to use another software, this software is a specially crafted mechanical models. “SolidWorks” is a specially crafted mechanical model of the software. At the beginning I used this software, but I found some problems which I need to draw components diagram. It is an important part. If the picture is not good, the production of spare components will be more difficult. So I gave up using this software.
Finally, I decided to use 3DS MAX software to do this model. I spent a lot of time, but I found that I can use the components which are completed before to make a new components. This is saved a lot of time. Through the production of Carburetor, I learned some new knowledge. When I made another model “Lawnmower”, I feel easier. At the same time, the production of methods is similar with Carburetor. When I finished the model, the modification is very important in this work. A good model is rely on modify rather than made out. So I spent a lot of time in this part. In general, the effect of the final model is still good.
When we do the animation, I have been listened the views of groups members carefully and seriously, look at how to do this animation. Because animation is not my strong point, so I have a lot of knowledge to consult our group members. When our group members do the animation, I always observed their methods and then research it after class. So I learned lots of technologies. This is the greatest benefit in this group work. Overall, this group work is great helpful to me. I have learned lots of new technology and knowledge.
Wednesday, 9 December 2009
Animation (week10-11)
After group meetings, we identified how to create animation. When we have watched the works of Robert, we think that he has some experience of the animation so this part is completed for Robert. First, we found a video of 2 stroke engine works onto the Internet. When the group members have watched video and understand the 2 stroke engine work principle. Then we began to prepare animation. We divided our animation into 3 parts: part one was the introduction, part two was the actual demonstration of the engine, and part three was the ending of the animation. We choose the PAL (24fm/s).And then Robert had positioned the lighting and the camera he produced this opening shot. We made the first part of animation is Introduction of the engine model. In this part of the animation we need to find a good position of camera, through a series of debugging, finally we completed this part of the animation. The following video shows is that the first part of our animation.The second part is the hardest and most important part in the animation. In order to do this part we have spent some time. When the production process, our group members found some problems. The first thought was to animate the piston. The only problem was that the piston shaft did not match the cam. Robert and Mike have watched animation many times, but still have not found the problem. The other members do not understand this problem. Finally,Mike found out the problem was with the key frames so they were out of place. The next stage was to do the top of the piston animation and to start animating the flow of liquids and gases within the engine. Robert decided to use ‘planes’ with textures. The following video show is that the second part of our animation. The last part of the animation is to create scenes animation. This part is needs of the Lawnmower models which I made it and the Kiel making a scene. This is the last part of the animation. It looked more vivid, and then used audio files which made in Mike. We will complete the animation.
Sunday, 6 December 2009
Create Lawnmower
To do the method of Lawnmower is similar Carburetor. First, I divided the Lawnmower I into several parts and separately to produce each a part, finally I assembled components together. At the beginning, when I got this picture of the Lawnmower, there is a lot of places that I can not understand how to do it. The photo is got from the Internet, so the picture is not very clear. I discussed the group members. Finally, I decided to start with the simplest place of the Lawnmower. As the experience of making Carburetor, it avoided many errors in the Carburetor model.
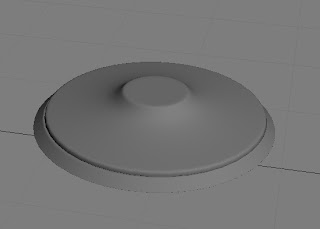
First I made the bottom of the components. Create a cone, set its parameters, and then converted to editable poly, select the vertexes and consistent with the photo to adjust the point position. Then I added a surface modification to change the model smooth. Finally, create a cone, so the bottom of the model was finished.

The production of wheels
when I made the wheels, I think my approach is relatively cumbersome, I have been looking for a good production methods, but it has not success. So I can only use this method. Despite spending a lot of time to complete these components, but the results was pretty good. First, create a Torus, and then converted to editable poly, select points, to modify. There is the more trouble in the editing process. The photograph of the wheel texture is not very clear, so I found a wheel picture from the Internet. According to photographs I made the model is becoming much easier. This method is required patience, it spent a lot of time to adjust the location of vertexes, but the result is very good. The method of connect the wheel’s components is similar with Carburetor. Create Cylinder and modify the model to reach the final effects.
when I made the wheels, I think my approach is relatively cumbersome, I have been looking for a good production methods, but it has not success. So I can only use this method. Despite spending a lot of time to complete these components, but the results was pretty good. First, create a Torus, and then converted to editable poly, select points, to modify. There is the more trouble in the editing process. The photograph of the wheel texture is not very clear, so I found a wheel picture from the Internet. According to photographs I made the model is becoming much easier. This method is required patience, it spent a lot of time to adjust the location of vertexes, but the result is very good. The method of connect the wheel’s components is similar with Carburetor. Create Cylinder and modify the model to reach the final effects.

Create Handrails
The model is mainly divided into several parts, first make a few basic models, and then adjust points to reach the final effects, finally make the model become smooth.
The model is mainly divided into several parts, first make a few basic models, and then adjust points to reach the final effects, finally make the model become smooth.

The final step is making some small components. When it finished the model, the modification is very important. In a separate production of the components, there are some parts are not match with the photo. It must be through the adjustment to be completed. First I added a Meshsmooth modifier to become smooth of the model. Then Observation, which areas is still not match with the photo. Then quit the Meshsmooth to adjust point position. Through repeated conditioning, the final match to meet the basic and photos. The same method, adjust the various parts of models. When I completed of model, I sent the model for my group members, finally we decided to put 2 stroke engine models on the Lawnmower, and then make another part of the animation.


Subscribe to:
Comments (Atom)